
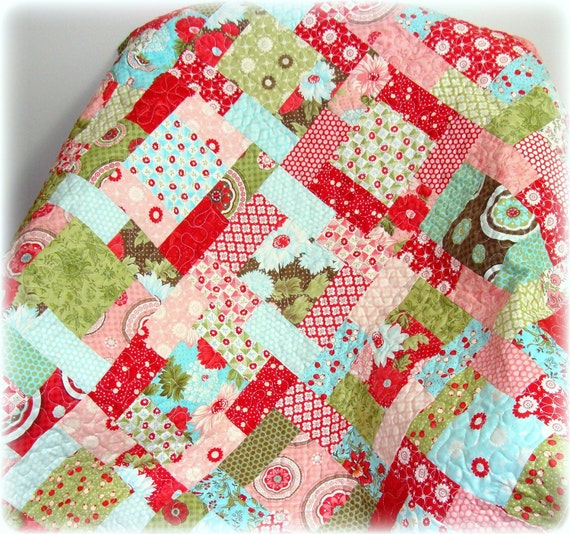
The Quilt:
The fabrics my sister chose had both white and off-white accents.
So I couldn't just choose one solid color for the center panel.
So I made used 6 inch blocks of a combination of white and off-whites
And some of the blocks had two fabrics on them, halved diagonally
(which I made by cutting out an 8-inch square, cutting it in half, sewing it together and then cutting it down to 6 inches. Does that make sense?)


The tree and owl were appliqued on and embroidered by my sewing machine.
 Dear Grace,
I love you
Thank you for being reliable
and for having electronic speed control
I could not have done this project without you.
Please continue to be nice to me.
I promise I will get you maintenanced regularly
and buy you shiny new needles.
Love,
Me
My only concern was that the owl was too pink. So I added some red tulips and a red border
Then it came time to quilt it.
I went out and bought a free-motion quilting foot for my machine.
I watched a movie and drew on a pattern
so it could look uniform and yet random
(from a template made by my loving and artistic husband)
I went out and bought a free-motion quilting foot for my machine.
I watched a movie and drew on a pattern
so it could look uniform and yet random
(from a template made by my loving and artistic husband)
 then did the sensible thing,
panicked,
and mailed the quilt to my mom

So I never actually finished the quilt.
I think that is currently outside of my abilities.
But it is being completed by a professional, which makes me feel much better about it.
Unfortunately that means I will not be able to provide any photos of the completed project.

Note: A lot of people have been asking me how this project compared to this one
They were very much the same.
Both were made with love for an adorable niece.
Both were very time consuming.
The quilt took a little more time than the blessing dress
but the blessing dress was more stressful.
That's because the blessing dress had to be a particular size
for a child who lives in a completely different state
and if the quilt turned out to be larger than anticipated (which it did) it doesn't really matter all that much.


