Friday, April 30, 2010

the smell of citrus


sorry about that last post.

i have been frustrated with a lot of things right now.
my toddler seems to be 'exerting his independence' through blatant defiance
and my body is stupid
and i have been kind of cranky about it all.
i'm working on it :)
anyway ...

I want a lime tree in my kitchen
although any citrus tree would do, I guess.

as soon as I am finished refinishing my new hutch
(I have been sanding every day until my arms ache)
and it is in its place
there will be a blank spot of wall
and I think a citrus tree would be perfect there.

I could grow my own zest
make awesome fajitas
or every now and then get a whiff of that fresh citrus scent

image via gardenandgreen


the only problem is, I have an incredibly black thumb.
I can barely keep silk plants alive.

When I was dating [the boy who is now my husband] I had to drop out of school and move back in with my parents for a while,
for health reasons.
And as I was leaving my boyfriend gave me a whispy little pot of white flowers.
so cute.

They died within the first week.

With his visit approaching my mom and I ran out and bought a replacement plant.
It didn't look at all like the first one.
My boyfriend noticed - he said, "Is this the same plant? It seems more robust"

I assured him it was just thriving under my tender loving care.
It wasn't.
The new plant was dead within a week.

This is just one example of many of my inability to keep plants alive.
I do my research, I follow instructions,
it just doesn't work out for me.

I have gotten a bit off topic, but I guess there wasn't much of a point to this post except to send this message out into the universe:
I want a lime tree in my kitchen.

Thursday, April 29, 2010

Dear Blog,


i hate you.

seriously.

i don't like blogging.

it takes up way too much time.
each post takes me almost an hour.
(although, I probably should write shorter posts)

and yet, for some reason,
i want people to read you

as in, people who aren't just my mother
(love you, Mom! thanks for reading!)

i don't know why.

maybe it is to verify that i have some degree of creativity
or that i have merit beyond my role as a wife and mother.

either way, it is definitely self-aggrandizing.

so you can probably take this as my pledge to be better.
to write on you more

i actually have a whole list of things i want to post about
not to mention the billions of posts i write in my head on a daily basis

but then i sit down in front of the computer and i am just too tired

my toddler is wearing me out

i have been feeling really lazy lately

and to top it all, i have been in a fashion slump

and the blahness of me has made me ignore you.

sorry.

i'm working on it.

Thursday, April 22, 2010

photo-shop tutorial

I don't have a very good camera
and it isn't likely that I will get a newer or better one soon.

So I am always looking for ways to improve my images

either through a better command of lighting when taking the initial photograph

or touching up photos in photo-shop afterward.

It is all very new to me and I am still very much in the process of learning.

I came across this tutorial today

and having never known what the Sponge did
I was eager to try it out.

I just opened a picture at random
and during my son's allotted half hour of TV time,
this is what I came up with:

before: after:
I think I may have gone a bit overboard and overexposed it,
but its a start!

Sunday, April 18, 2010

the cure-all cookies

ever since becoming a mother I have been on a quest to find the perfect chocolate-chip cookie recipe.

the kind of cookie that heals heart-ache and repairs those terrible, horrible, no-good,
very bad days.

I have tried A LOT of recipes.

(pretty much every recipe I have ever come across, to be exact ... except this one. You are welcome to try it and compare it to my recipe, if you like. let me know how it turns out ;) )

but I kept running into the same two problems:
either my cookies tasted great but didn't look good
or they looked great but didn't taste as good as they looked

so I decided to come up with the perfect recipe on my own


I really liked Emily's (from Sugar Plum) use of browned butter in her chocolate chip cookie recipe

but, and no-offense Emily because I think you are an awesome baker, they just weren't pretty enough

so I combined the browned butter with a few other elements from recipes I liked and this is what I came up with:

assembling all the ingredients


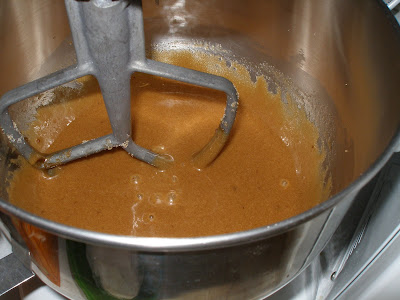
browning the butter

creaming the other cube of butter with the sugar while the butter on the stove is browning

I love that nutty aroma of browned butter

adding the browned butter and vanilla to the creamed stuff

mmmmmmmm ... my kitchen now smells like caramel

adding the rest of the ingredients with the help of my little chef


Chocolate-Chip Cookies
Preheat oven to 350
Yields at least 5 dozen

2 cups brown sugar
1 ½ cups white sugar
1 cup (2 sticks) unsalted butter, softened
1 cup (2 sticks) salted butter, browned*
2 Tbsp. vanilla
3 eggs
6-6 ½ cups flour
2 tsp. baking soda
1 ½ tsp. salt
12 oz. semi-sweet chocolate chips

In a large mixing bowl add sugars and 1 cup of softened butter. Brown other cup of butter, then add to sugars. Cream sugars and butters. Add vanilla and eggs. Add dry ingredients and mix completely. Stir in chocolate chips. Roll into balls and place on ungreased baking sheet. Bake at 350 for 10 minutes, or until golden brown.

*To brown butter: melt butter over medium heat. Cook, stirring constantly, until the foam begins to subside and butter becomes a light tan color. Remove the pan from the heat. The butter will continue cooking even after you remove it from the burner. Add immediately to the sugars. Notice the dramatic change in color: it should be nut-brown and have a toasty aroma. Overcooked butter will have a very bitter taste.


Wednesday, April 14, 2010

Hot Dog Buns

We had hot dogs for dinner.

But to make the meal more fancy
i made my own buns.


these babies are amazing.

try them - you will NEVER buy hot dog or hamburger buns again.

their only flaw? they take 5 hours to make.

the good news is, they freeze beautifully

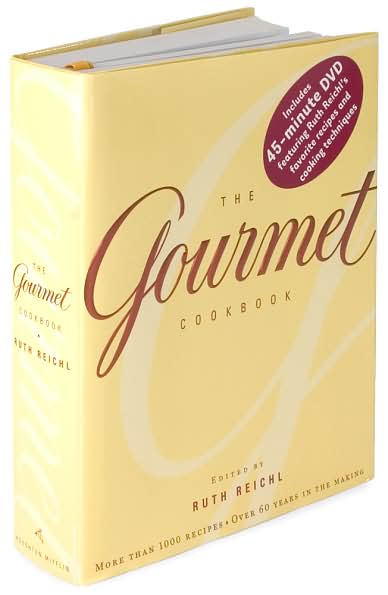
I got the recipe from The Gourmet Cookbook
(my go-to book for almost everything)


Hamburger Buns (recipe by Joyce McClelland in The Gourmet Cookbook, page 614)
makes 20 buns
active time: 30 minutes start to finish: 5 1/2 hours

2 cups whole milk
1/4 cup warm water (105-115 degrees F)
2 (1/4-ounce) packages (5 teaspoons) active dry yeast
1/4 cup plus 1/2 teaspoon sugar
1/2 stick (4 Tablespoons) unsalted butter, cut into tablespoons and softened
2 large eggs, lightly beaten
1 Tablespoon salt
6-6 1/2 cups all-purpose flour


Bring milk to a bare simmer in a small saucepan over moderate heat. Remove from heat. Let cool to 105-115 degrees.

Meanwhile, stir together warm water, yeast, and 1/2 teaspoon sugar in mixer bowl until yeast is dissolved. Let stand until foamy, about 5 minutes. (If mixture doesn't foam, discard and start over with new yeast.)

Add butter and remaining 1/4 cup sugar to yeast mixture and mix with paddle attachment at low speed until just combined. Add warm milk and mix until butter is melted, then add eggs and mix until well combined. Add salt and 4 cups flour and mix, scraping down sides of bowl with a rubber spatula as necessary, until flour is just incorporated. Increase speed to medium and beat until well combined, about 1 minute.

Switch to dough hook and beat in 2 cups flour at medium speed, scraping down sides of bowl once or twice, until dough pulls away from sides of bowl, about 2 minutes; if necessary, add additional flour, 1 Tablespoon at a time. Beat for 5 minutes more. (Dough will be sticky.)

Transfer dough to a lightly oiled large bowl and turn to coat with oil. Cover tightly with plastic wrap and let rise in a warm draft-free place until doubled in bulk, about 2 1/2 hours.

Butter two large baking sheets. Punch dough down. Turn out onto a lightly floured surface and roll out into a 14-inch round (about 1/2 inch thick) with a floured rolling pin. Using a floured 3-inch round cutter, cut out as many rounds as possible and transfer to buttered baking sheets, arranging them 3 inches apart to allow for expansion. Gather and reroll scraps and cut out more buns in same manner.

Cover buns loosely with oiled plastic wrap and let rise in a warm draft-free place until they hold a finger mark when gently pressed, 1 1/2 to 2 hours.

Put racks in upper and lower thirds of oven and preheat oven to 375.

Bake buns, switching position of sheets halfway through baking, until tops are golden and bottoms are golden brown and sound hollow when tapped, 14 to 20 minutes. Transfer to racks to cool completely.


Sunday, April 11, 2010

Blessing Dress part 1

Sorry for my silence.

I have been working like a mad woman over here

I made a blessing dress/Christening gown for my niece

This is the original design:
made of dupioni silk
with a pick up skirt on the overlay
I made it my way - without a pattern


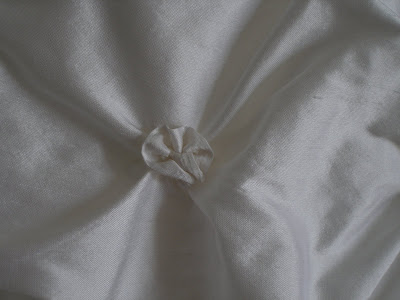
the most time-consuming part was these rosettes

because they took 20 minutes each
and I had to make 75


isn't she pretty?


my favorite part was the bonnet


the camera didn't do it justice.
especially not my little point-and-shoot

the fabric was so luxurious
and my niece was so pretty

as soon as I receive the photos taken by the professional
I will post them for you